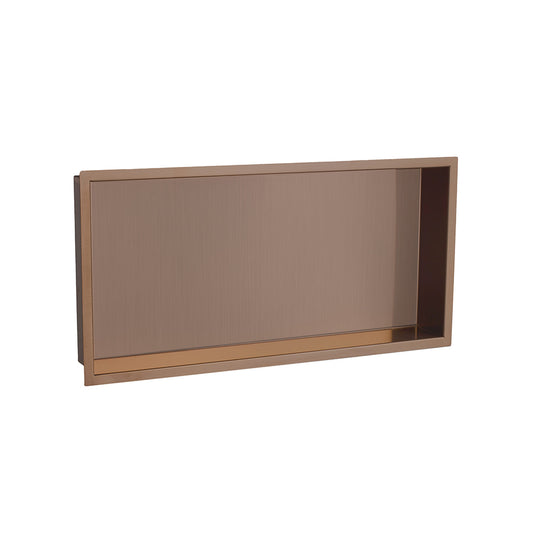
How to Build a Better Shower Niche
Table Of Contents:
-
Boost Your Bathroom’s Appeal
→ -
Shower Accessories Collection
→ -
Planning and Design
→ -
Building Materials
→ -
Construction Steps for Building a Better Shower Niche
→ -
Maintenance and Cleaning
→ -
Common Mistakes to Avoid
→ -
Tips for Best Results
→ -
Conclusion
→
Boost Your Bathroom’s Appeal: Step-by-Step Guide to Building a Better Shower Niche
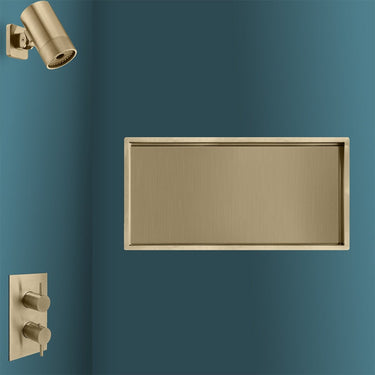
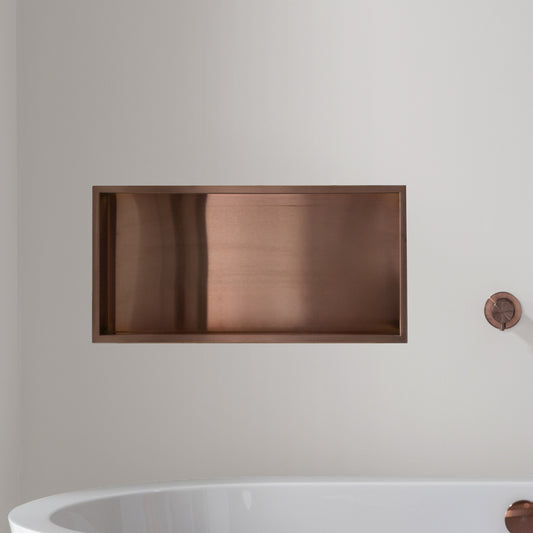
Ready to transform your shower space into a stylish sanctuary? A custom shower niche could be just what you need! Imagine having a built-in, neatly designed space for all your shower essentials—no more cluttered shelves or hanging caddies. Whether you’re tackling a DIY renovation or simply looking to elevate your bathroom's functionality, understanding how to build a better shower niche can make all the difference. In this guide, we'll walk you through every step, from planning and design to the final touches, ensuring your niche not only looks stunning but functions perfectly. Get ready to dive into the details and discover how you can create a niche that blends seamlessly with your shower design, enhances storage, and adds a touch of elegance to your bathroom. Let’s get started!
Planning and Design
Shower Niche Design: Designing a shower niche involves choosing between custom, preformed, and modified options based on your shower’s dimensions and your design preferences.
Custom Niches: Custom niches are designed to fit specific measurements and design needs. This option allows for flexibility in size, shape, and placement, accommodating unique bathroom layouts and aesthetic requirements. You can tailor the niche to match your shower’s exact dimensions, ensuring it integrates seamlessly with the overall design. Custom niches are ideal if you have specific needs, such as a non-standard tile layout or a unique space configuration. This approach often involves more planning and can be more costly, but it provides the most personalized solution.
Preformed Niches: Preformed niches are factory-made units that come in standard sizes and shapes, making them a convenient option for many bathrooms. They are designed for easy installation and typically include built-in waterproofing, reducing the need for additional measures. However, preformed niches may not always fit perfectly with your existing tile layout or shower dimensions, which can lead to visible seams or awkward placement. These niches are a quicker solution compared to custom designs but might require some adjustments to fit seamlessly into your bathroom.
Modified Niches: Modified niches involve adapting preformed units to better fit your specific needs. This might include trimming the edges of a preformed niche or combining several units to achieve the desired size and shape. Modifying a preformed niche allows you to benefit from the convenience of pre-fabrication while tailoring the niche to better match your shower design. This approach can be a practical compromise if you find a preformed niche close to what you need but requires some customization to fit perfectly.
Tile Layout: The tile layout around your niche plays a critical role in ensuring a cohesive and visually appealing shower design.
Aligning Tiles: Proper alignment of tiles is essential for creating a seamless look. The tiles inside the niche should align with those on the shower walls to maintain consistency and avoid awkward gaps or uneven lines. Careful planning is needed to ensure that grout lines and tile patterns flow naturally from the wall into the niche. This alignment helps in creating a visually pleasing and professional finish, making the niche appear as an integral part of the shower rather than an afterthought.
Tile Coordination: Coordinating the tile colors and patterns between the niche and the rest of the shower is key to achieving a harmonious design. Choose tiles for the niche that complement the wall tiles in terms of color, pattern, and size. This coordination enhances the overall aesthetic and prevents clashes that can detract from the design. For example, if you have a bold pattern on the shower walls, a simpler tile in the niche can help to balance the look and keep the design from becoming too overwhelming.
Framing Considerations: Framing is a crucial step in the installation of a shower niche, as it provides the necessary support and ensures stability.
Blocking: Adding blocking, which involves installing extra wood supports within the wall cavity, is essential for providing a sturdy backing for the niche. This support prevents the niche from shifting or collapsing and ensures it can hold the weight of the tiles and any items stored in it. Proper blocking also helps in achieving a flush installation and maintains the structural integrity of the wall around the niche.
Stud Cutting: When framing for a niche, you may need to cut into wall studs. It’s important to distinguish between exterior walls, load-bearing walls, and non-load-bearing walls. Cutting into exterior walls or load-bearing walls can compromise the structural integrity of your home and is generally avoided. Instead, focus on non-load-bearing walls where modifications are less likely to affect the building’s stability. If stud cutting is necessary, ensure that you reinforce the area adequately to maintain support.
Wall Types: Understanding the type of wall you are working with is crucial for choosing the right materials and methods.
Exterior Walls: These walls face the outside environment and may be subject to temperature fluctuations and moisture. When installing a niche in an exterior wall, it is essential to ensure proper insulation and weatherproofing to prevent moisture ingress and energy loss. Additionally, extra care should be taken to seal any openings around the niche to protect against drafts and ensure the longevity of the installation.
Load-Bearing Walls: Load-bearing walls support the weight of the structure above and should not be modified without professional consultation. Cutting into these walls can affect the structural integrity of your home and is generally avoided unless necessary structural reinforcements are made. When planning to install a niche, choose non-load-bearing walls whenever possible to avoid compromising the building’s stability.
Non-Load-Bearing Walls: These walls do not support structural weight and are ideal for modifications such as installing a shower niche. Non-load-bearing walls offer more flexibility and are easier to cut and frame for niche installation. Ensure that the wall is adequately supported and reinforced as needed, but modifications are generally less complex compared to load-bearing walls.
Building Materials
Foam Boards: Foam boards are a popular material for constructing shower niches due to their waterproof properties and ease of handling.
Waterproof Properties: Foam boards are designed to be water-resistant, which is crucial for areas exposed to high humidity and moisture like shower niches. They help prevent water damage and mold growth by providing a waterproof barrier. The inherent waterproof nature of foam boards reduces the need for additional waterproofing layers, simplifying the installation process.
Ease of Cutting: Foam boards are easy to cut with a utility knife, allowing for precise and straightforward adjustments during installation. This ease of cutting helps in creating a custom fit for the niche and reduces the time and effort required for installation. Unlike other materials that may generate dust or require heavy tools, foam boards provide a cleaner and more efficient option for niche construction.
Installation: Foam boards are typically installed using adhesive and secured with screws or fasteners. The installation process involves applying adhesive to the back of the foam board and pressing it firmly against the wall. For added stability, secure the boards with screws or fasteners, ensuring that all edges are sealed with sealant to maintain waterproofing.
Cement Boards: Cement boards are a durable option for shower niches, offering a robust surface for tiling.
Durability: Cement boards are highly durable and can withstand the moisture and wear typical in shower environments. They provide a solid base for tile installation and help support the weight of the tiles without sagging or cracking. This durability makes cement boards a reliable choice for creating long-lasting shower niches.
Waterproofing: While cement boards are moisture-resistant, they require additional waterproofing to ensure complete protection. Apply a waterproofing membrane over the cement boards to prevent water from seeping through and causing damage. This extra layer of protection is essential for maintaining the integrity of the shower niche and preventing mold growth.
Installation: Cut cement boards to the appropriate size and secure them to the wall using thinset adhesive and screws. Cover seams with mesh tape and apply a waterproofing membrane to seal the boards completely. The installation process involves precise cutting and secure attachment to ensure a stable and moisture-resistant niche.
Waterproofing Membranes: Waterproofing membranes are essential for protecting your shower niche from water damage.
Sheet Membranes: Sheet membranes are pre-formed waterproof barriers that are applied directly to the surface. They come in large sheets that are adhered to the wall and seams are sealed to create a continuous waterproof layer. Sheet membranes are effective at preventing water infiltration and are ideal for high-moisture areas like shower niches.
Liquid Waterproofers: Liquid waterproofers are applied with a brush or roller and form a flexible, waterproof coating on the surface. They conform to the shape of the wall and fill in any irregularities, providing a complete seal against moisture. Liquid waterproofers are versatile and can be used on various surfaces, including those with complex shapes or joints.
Application: Apply the chosen waterproofing membrane according to the manufacturer’s instructions. For sheet membranes, overlap seams and ensure full adhesion to the surface. For liquid waterproofers, apply multiple coats if necessary, allowing each coat to dry before applying the next. Proper application ensures that all potential entry points for water are sealed and protected.

Construction Steps for Building a Better Shower Niche
Backer Board Installation:
Cutting the Backer Board: Start by measuring the dimensions of the niche carefully. Transfer these measurements to the backer board, ensuring you account for any adjustments required for precise fitting. Use a utility knife for straight cuts or a circular saw for larger, more intricate cuts. The backer board will serve as a foundational layer for tiling, providing a stable and moisture-resistant surface. Ensure that all cut edges are smooth to prevent any gaps or uneven surfaces once the tiles are installed. The backer board should fit snugly within the niche, with a small gap of about 1/8 inch around the edges to allow for expansion and movement.
Applying Thinset: Once the backer board pieces are cut to size, apply a layer of thinset adhesive to the wall where the backer board will be installed. Thinset, a type of mortar, acts as a bonding agent between the backer board and the wall surface. Using a notched trowel, spread the thinset evenly, creating ridges that will help the backer board adhere securely. The consistency of the thinset should be smooth, not too thick or runny. Proper application of thinset ensures a strong bond, preventing the backer board from shifting or loosening over time.
Securing with Screws: Position the backer board against the wall, pressing it firmly into the thinset. Use cement board screws to secure the backer board to the wall studs. Space the screws approximately 8 inches apart along the edges of the board and every 12 inches in the center areas. Ensure that the screws are driven in flush with the surface of the backer board to avoid creating bumps under the tile. Proper screw placement is essential for a stable and secure installation. Be careful not to overtighten the screws, as this can cause the board to crack or become damaged.
Ensuring Proper Alignment: After securing the backer board, use a torpedo level to check that it is perfectly level and aligned. Place the level across the surfaces of the backer board to ensure there are no high or low spots. Proper alignment is crucial for a professional-looking tile job. If any adjustments are needed, make them before proceeding with tile installation. An even surface ensures that the tiles will be laid flat, reducing the risk of uneven grout lines and gaps.
Slope:
Creating a Proper Slope: At the bottom of the niche, it’s important to create a slight slope to facilitate proper drainage. The recommended slope is approximately 1/8 inch per foot, ensuring that any water that enters the niche will flow towards the drain rather than pooling. To achieve this, use a straightedge or level to measure and mark the desired slope. You can build up the slope using a thin layer of mortar or by adjusting the backer board installation. Proper slope ensures that the niche remains dry and free from standing water, which can cause mold and mildew growth.
Checking the Slope: Once the slope is created, use a torpedo level to verify its accuracy. Place the level across the bottom of the niche to ensure that the slope is consistent from one end to the other. Adjust as needed before proceeding with the tile installation. A properly sloped surface is critical for effective water drainage and to prevent water damage within the niche. After verifying the slope, allow any mortar or adjustments to set before moving on to the next steps.
Sealing and Waterproofing:
Applying Sealant: For foam boards, apply a bead of sealant around the edges where the foam board meets the wall to ensure a watertight seal. Use a caulk gun to apply the sealant evenly, pressing it into any gaps or joints. For cement boards, cover all seams and corners with mesh tape, then apply a thin layer of thinset over the tape to seal the seams. Sealant prevents water from penetrating behind the backer board, which could lead to mold and water damage.
Using Mesh Tape and Thinset: For cement boards, apply mesh tape over all seams and corners before applying thinset. The mesh tape reinforces the seams, preventing cracks and gaps. Spread a layer of thinset over the tape, smoothing it out with a trowel. Allow the thinset to dry completely before proceeding. Proper sealing and application of thinset ensure a continuous, waterproof barrier, protecting the niche from moisture infiltration.
Waterproofing Membranes: Choose between sheet membranes and liquid waterproofers for additional protection. Sheet membranes should be cut to fit the niche and applied over the backer board, ensuring that all seams are overlapped by a few inches. Smooth out any air bubbles to ensure full coverage. Liquid waterproofers can be applied with a brush or roller, covering the entire surface of the backer board. Allow the waterproofing membrane to dry as per the manufacturer’s instructions before proceeding with tile installation. Waterproofing membranes protect the niche from water damage and mold growth.
Tile Installation:
Aligning Tiles: Begin tiling by aligning tiles within the niche and matching them with the existing wall tiles. Use tile spacers to maintain consistent gaps between tiles and ensure that they are aligned properly. An even alignment will create a professional and cohesive look, blending the niche seamlessly with the rest of the shower.
Applying Tile Adhesive: Spread tile adhesive (thinset) on the backer board using a notched trowel, applying an even layer. The notched trowel creates ridges that help the tiles adhere securely to the backer board. Press each tile into the adhesive, ensuring good contact and a secure bond.
Placing and Spacing Tiles: Place tiles carefully, using spacers to maintain uniform gaps. Press tiles firmly into the adhesive, and use a level to check alignment. Adjust tiles as needed before the adhesive sets.
Cutting Tiles: If necessary, cut tiles to fit around the edges of the niche using a tile cutter or wet saw. Ensure that cuts are clean and precise to avoid gaps and uneven edges.
Grouting: After the adhesive has set (typically 24 hours), remove the spacers and apply grout between the tiles. Use a rubber float to spread the grout and press it into the joints. Wipe away excess grout with a damp sponge, being careful not to remove grout from the joints. Allow the grout to cure as per the manufacturer’s instructions.
Cleaning and Sealing: After the grout has dried, clean any grout haze from the tiles with a damp cloth. Apply a grout sealer to protect the grout from stains and moisture. Proper sealing ensures long-term durability and easy maintenance of the tiles.
Additional Considerations:
Checking for Leaks: After installation, test the niche for leaks by spraying water and checking for any signs of leakage around the edges. Proper sealing and waterproofing should prevent leaks, but it’s important to confirm before using the shower.
Allowing Drying Time: Allow adequate drying time for all materials, including adhesive, grout, and waterproofing membranes, before using the shower. This ensures that all components have been cured properly and reduces the risk of damage.
By following these detailed construction steps, you’ll create a well-built, functional, and aesthetically pleasing shower niche that enhances both the utility and style of your bathroom.

Maintenance and Cleaning
Post-Installation: After completing the installation of your custom shower niche, thorough cleaning is essential to ensure the longevity and appearance of your work. Start by wiping down the entire area to remove any grout haze left from the tiling process. Grout haze can cloud the finish of your tiles and grout lines, making the surface look dull. Use a damp cloth or sponge, and if necessary, a mild cleaner designed for tile surfaces. Avoid abrasive pads or harsh chemicals that might scratch the tiles or weaken the grout. Pay particular attention to the caulk joints around the niche, ensuring that they are smooth and well-sealed. This prevents moisture from seeping into the walls, which could lead to mold growth and structural damage. Additionally, applying a grout sealer helps to protect the grout from moisture and stains, making it easier to maintain the cleanliness and appearance of the grout lines over time.
Regular Cleaning: To keep your niche looking pristine, implement a regular cleaning routine. Use a mild, non-abrasive cleaner appropriate for your tile material to avoid damaging the finish. A soft cloth or sponge works well for removing soap scum and grime. Avoid using harsh or acidic cleaners that can erode grout or tile finishes. Regular cleaning helps to prevent build-up of soap scum, mildew, and other residues that can make your niche look less appealing. Keeping the niche dry and clean will also prevent the growth of mold and mildew, which thrive in damp environments. Regularly inspect the caulk and grout to ensure they are intact and functioning properly. Any small issues, like minor grout cracks or loose tiles, should be addressed promptly to maintain the integrity and aesthetics of your niche.
Preventative Maintenance: Periodic inspections of your shower niche can help catch and address problems early before they become more serious issues. Check for signs of wear and tear, such as cracked or chipped tiles, and address these problems promptly to prevent further damage. For foam board niches, inspect the sealant and waterproofing membranes regularly to ensure they are holding up well. If you notice any leaks or signs of water damage, address them immediately. This may involve re-sealing the niche or replacing damaged tiles. Regular maintenance not only preserves the look of your niche but also ensures that it functions properly and remains a durable and practical feature in your shower.

Common Mistakes to Avoid
Incorrect Niche Framing: Improper framing of your shower niche can lead to significant issues with tile alignment and overall aesthetics. To avoid this mistake, ensure that the niche is framed accurately according to your design specifications. Measure and cut the framing materials carefully to match the dimensions of your planned niche. Misalignment can result in awkward gaps or misfit tiles, which can be visually unappealing and may affect the stability of the niche. Ensure that the niche is level and properly aligned with the surrounding walls and tiles. Accurate framing ensures that the niche integrates seamlessly into the shower wall and provides a professional and polished finish.
Inadequate Waterproofing: Inadequate waterproofing is a critical issue that can lead to significant damage over time. It’s essential to thoroughly seal all seams and joints in the niche to prevent water from penetrating behind the tiles. For foam board niches, use a high-quality sealant around all edges. For cement board niches, apply mesh tape and thinset over all seams to create a strong, water-resistant barrier. Apply a waterproofing membrane over the entire niche area to ensure comprehensive protection. Neglecting proper waterproofing can result in water damage, mold growth, and deterioration of the wall structure behind the tiles. Ensuring that every seam and joint is properly sealed will help maintain the integrity and longevity of your shower niche.
Ignoring Tile Layout and Alignment: Proper tile layout and alignment are crucial for achieving a cohesive and visually pleasing result. Failing to align the tiles correctly within the niche can result in uneven grout lines and a disjointed appearance. Before installing tiles, check that they fit well within the niche and align with the tiles on the surrounding walls. Use tile spacers to maintain consistent grout lines and ensure that the tiles are evenly spaced. A torpedo level can help confirm that tiles are installed straight and level. Proper alignment not only enhances the visual appeal of the niche but also ensures that the tiles adhere correctly and remain secure over time.
Over-tightening Screws or Valves: When securing the backer board or other components of the niche, it’s important not to over-tighten screws or valves. Over-tightening can damage the materials, causing cracks in the backer board or pressure points that may lead to leaks or structural issues. Tighten screws just enough to secure them without applying excessive force. If you encounter resistance, stop tightening to avoid damaging the materials. Proper tightening ensures that the niche components are securely fastened while preventing damage that could compromise the integrity of the installation.

Tips for Best Results
Dry Fitting: Before applying adhesive and setting tiles, perform a dry fit to ensure that all tiles fit correctly within the niche. Dry fitting allows you to check for proper alignment and make any necessary adjustments to the tile placement. Lay out the tiles in the niche without adhesive to verify that they fit well and that the pattern aligns with the surrounding wall tiles. This step helps identify potential issues and ensures a smoother installation process. Dry fitting also helps you visualize the final look of the niche and make any adjustments before committing to the final installation.
Accurate Cutting: Precise cutting of tiles is essential for achieving a clean and professional finish. Measure and cut tiles carefully to ensure they fit perfectly within the niche. Use a tile cutter or wet saw for accurate cuts, and avoid making rough or uneven cuts that can detract from the overall appearance. Ensure that tiles are cut to fit snugly within the niche and align with the surrounding tiles. Proper cutting not only improves the visual appeal of the niche but also ensures that tiles adhere properly and remain secure.
Checking Alignment: Use alignment tools such as a torpedo level to ensure that tiles are installed straight and level. Accurate alignment is crucial for a polished and cohesive look. Misaligned tiles can result in uneven grout lines and a disjointed appearance. Regularly check the alignment of tiles as you install them, and make adjustments as needed to ensure a straight and level finish. Proper alignment contributes to a professional and visually appealing result.
Allowing Proper Drying Time: After installing the backer board, waterproofing membranes, and tiles, it’s important to allow adequate drying time for each layer. Follow the manufacturer’s recommendations for drying and curing times to ensure that materials are set properly. Rushing the drying process can lead to issues with adhesion and water damage. Allow sufficient time for each layer to dry and cure before proceeding with the next steps to ensure a durable and long-lasting installation.
Using Quality Materials: Investing in high-quality materials is essential for achieving the best results in your shower niche construction. Quality backer boards, waterproofing membranes, and tile adhesives contribute to the durability and longevity of the niche. Inferior materials may lead to issues such as leaks, mold growth, and premature wear. Choose materials that are specifically designed for use in wet environments and ensure that they meet industry standards for performance and durability.
Regular Inspections: Periodically inspect your shower niche for any signs of wear or damage. Look for loose tiles, grout cracks, or any issues with the waterproofing. Regular inspections help catch and address small issues before they become major problems. Promptly address any issues, such as re-sealing seams or replacing damaged tiles, to maintain the integrity and appearance of your niche over time.
Conclusion
Building a custom shower niche might seem like a daunting task, but with careful planning and attention to detail, you can create a stunning and functional feature that elevates your shower experience. By choosing the right materials, following precise construction steps, and avoiding common pitfalls, you’ll ensure your niche not only looks fantastic but also stands the test of time. Imagine stepping into your shower and reaching for your neatly organized essentials, all housed within a beautifully crafted niche. It’s a small upgrade that can make a big difference in both aesthetics and convenience.


