How to Remove Mould from Your Home: A Detailed Step-by-Step Guide
Table Of Contents:
-
Introduction
→ -
Shower Valves Collection
→ -
Identify the Source of Moisture
→ -
Understand the Different Types of Mould
→ -
Gather the Right Cleaning Materials
→ -
Clean the Mould
→ -
Natural Remedies for Mould Removal
→ -
Ensure Proper Ventilation
→ -
Dry the Affected Area
→ -
Prevent Future Mould Growth
→ -
When to Call a Professional
→ -
Top Tips for Effective Mould Removal and Prevention
→ -
How to Remove Mould from Different Surfaces
→ -
How Does Mold Develop in Your Home?
→ -
How to Prevent Mold Growth
→ -
The Dangers of Mold: How It Affects Your Home and Health
→ -
How to Prevent Mold in Your Home?
→ -
Most Common Types of Mold Found in Homes
→ -
What Does Mold Affect in Homes?
→ -
Conclusion: Stay Proactive and Keep Mould at Bay
→ -
Frequently Asked Questions
→
Introduction
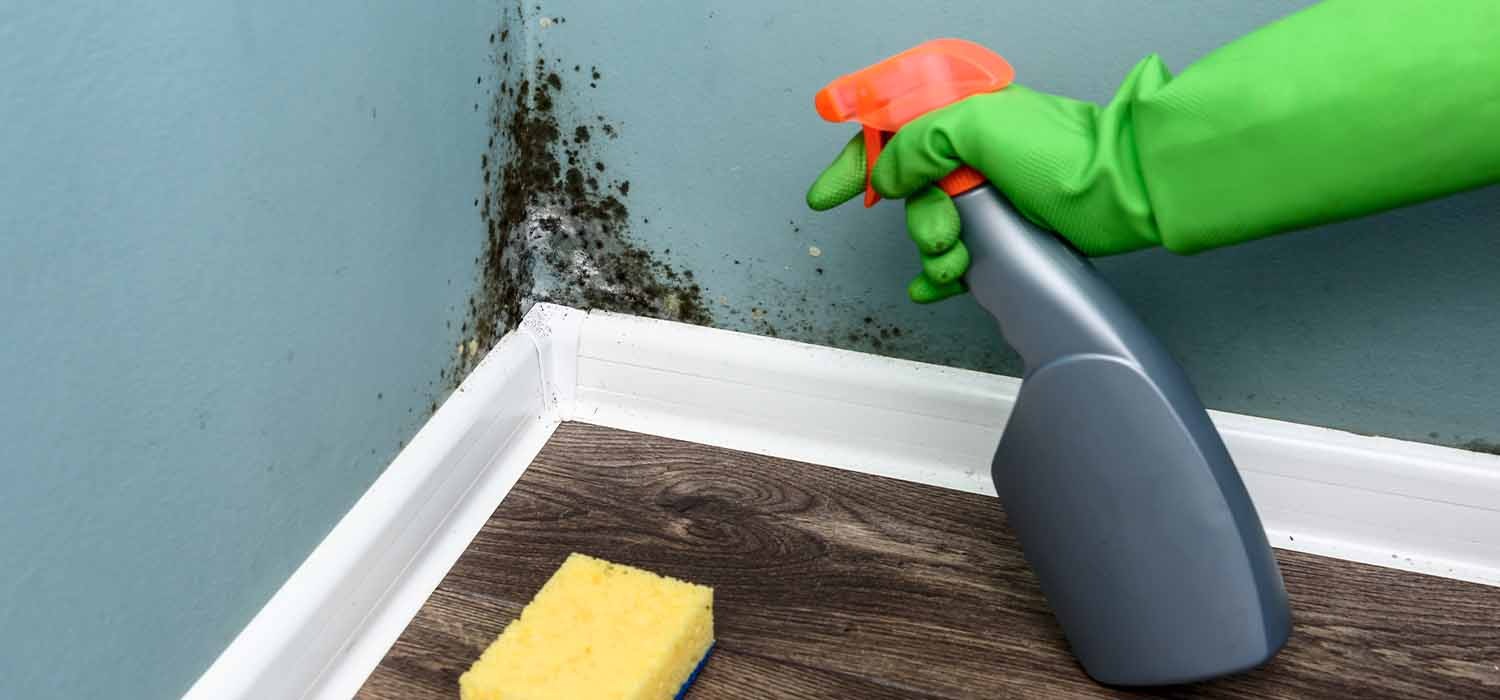
Mould not only compromises the appearance of your home but also poses health risks. Left untreated, it can cause respiratory issues and allergies. To effectively remove mould and prevent its return, it's crucial to address both the immediate problem and the root causes. Here's an in-depth guide for successful mould removal and long-term prevention.
1. Identify the Source of Moisture
Mould thrives in damp environments, so the first step in mould removal is identifying the source of moisture. This could be leaks in your plumbing, roof, or even condensation from poor ventilation. Moisture can also build up from high humidity, often seen in bathrooms and basements. Once the source is identified, it must be fixed to prevent future growth. Failing to address this root cause means mould will likely return.
Tip: Routinely check for leaks and cracks, especially in high-humidity areas like bathrooms and kitchens.
2. Understand the Different Types of Mould
Different types of mould require different approaches to removal. Below are the common types you may encounter:
Black Mould (Stachybotrys chartarum): Known for its toxic properties, black mould can cause serious health issues, particularly respiratory problems. It requires careful handling and prompt removal.
White Mould: Often mistaken for mildew, white mould can still cause significant health concerns, including allergic reactions.
Pink Mould: Commonly found in bathrooms, this mould thrives in humid conditions, particularly around showers and tubs.
Aspergillus: Found on food or materials like carpets, aspergillus can trigger allergies and respiratory issues.

3. Gather the Right Cleaning Materials
To safely and effectively remove mould, ensure you have the following tools:
- Protective gear such as rubber gloves, a mask, and goggles.
- Cleaning solutions like mould remover, white vinegar, or hydrogen peroxide.
- A scrub brush or sponge to scrub away the mould.
- A bucket of clean water for rinsing.
- Clean rags or towels for wiping away moisture.
Avoid using bleach on porous materials, as it may not kill mould deeply embedded in the surface.
4. Clean the Mould
For small mould patches, natural cleaners like white vinegar or hydrogen peroxide work well. Simply apply the cleaner to the affected area, let it sit for about 10–15 minutes, and scrub with a brush. Wipe down with a clean, damp rag to remove any residue.
For larger mould infestations, use a commercial mould cleaner designed for specific materials, such as drywall or tiles.

5. Natural Remedies for Mould Removal
If you prefer eco-friendly cleaning options, consider using natural remedies. These are effective and safe alternatives to harsh chemicals:
White Vinegar: Spray vinegar directly on the mould and let it sit for about an hour. Scrub the area, then wipe it clean.
Baking Soda: A gentle abrasive, baking soda mixed with water forms a paste that works well on porous surfaces like grout.
Tea Tree Oil: Known for its antifungal properties, just a few drops mixed with water can help eliminate mould in hard-to-reach areas.
6. Ensure Proper Ventilation
After mould removal, the key to preventing future growth is ensuring good airflow. Mould thrives in stagnant air, so ventilating your home can significantly reduce humidity levels. Open windows, use exhaust fans, or install a dehumidifier to control moisture, especially in areas prone to mould like bathrooms.
- Tip: Always ventilate your bathroom after showers to minimize the build-up of moisture.
7. Dry the Affected Area
Mould requires moisture to grow, so drying the area thoroughly is crucial in preventing regrowth. Use fans or dehumidifiers to help dry the affected area quickly. The faster the area dries, the less likely it is that mould will return.
8. Prevent Future Mould Growth
Mould can return if the moisture issue is not resolved. To prevent mould from coming back:
Use mould-resistant paints and sealants to protect surfaces.
Inspect areas prone to dampness regularly, such as bathrooms, attics, and basements.
Install moisture barriers in areas like crawl spaces to prevent condensation from building up.
9. When to Call a Professional
For extensive mould infestations or cases that affect the structure of your home, hiring a professional mould removal service is often the best course of action. Professionals have the experience, tools, and safety measures needed to handle severe mould problems and ensure all hidden mould is removed safely.
10. Top Tips for Effective Mould Removal and Prevention
Regular Inspections: Routinely check high-risk areas like basements, attics, and bathrooms for early signs of mould.
Use Moisture Absorbers: Products like silica gel or desiccants help absorb moisture and reduce humidity in vulnerable areas.
Fix Leaks Immediately: Even minor leaks can create an environment conducive to mould growth. Repair leaks in pipes, roofs, and windows as soon as possible.
Install a Dehumidifier: Consider using a dehumidifier in moisture-prone areas, such as bathrooms or basements, to help reduce humidity.

11. How to Remove Mould from Different Surfaces
Walls: Mould on walls can usually be treated with a mixture of white vinegar or hydrogen peroxide. Apply the solution, let it sit for 10 minutes, scrub with a brush, and wipe clean with a damp cloth.
Sealant & Grout: Mould tends to thrive in bathroom sealants and grout lines. Apply a mixture of baking soda and water or hydrogen peroxide, let it sit for 15 minutes, and scrub with a toothbrush. Rinse with water and dry thoroughly to prevent regrowth.
Fabric: Mould can damage fabrics like curtains, upholstery, and cushions. Wash fabrics in hot water with detergent. If the mould persists, use vinegar or a mould removal product before washing, and always air-dry the fabric completely.
Furniture: For wooden furniture, mix water and vinegar and wipe down affected areas. For non-porous furniture like plastic or metal, use a commercial mould remover. Always ensure the furniture is thoroughly dried after cleaning.
How Does Mold Develop in Your Home?
Mold is a type of fungus that thrives in damp, warm, and poorly ventilated spaces. Understanding how mold forms can help you prevent its growth in your home. Here’s an overview of the conditions that contribute to mold formation and how it spreads:
1. Moisture is Essential
Mold needs moisture to grow. It typically begins to form when surfaces or areas remain wet for an extended period. Common causes of excess moisture include:
-
Leaky plumbing or fixtures.
-
Water damage from floods, heavy rain, or roof leaks.
-
Condensation on cold surfaces such as windows or walls, especially during temperature changes.
-
Damp spaces like basements, bathrooms, or kitchens where water is often used.
2. Poor Ventilation
Inadequate airflow causes moisture to linger in the air, creating ideal conditions for mold to develop. Without proper ventilation, humidity builds up, contributing to mold growth.
-
Rooms like bathrooms, attics, and basements with minimal airflow are particularly prone to mold.
-
Sealed windows or rooms with little circulation trap moisture, making it easier for mold to form.
3. Organic Materials as Food Sources
Mold thrives on organic materials such as wood, drywall, fabric, carpet, and paper. These materials act as a food source when they become damp.
-
Wooden surfaces and flooring are especially vulnerable if exposed to moisture for prolonged periods.
-
Drywall and plasterboard can absorb moisture easily, making them prime spots for mold to grow.
4. Mold Spores in the Air
Mold spores are present both indoors and outdoors. These microscopic spores can settle on surfaces, and when the conditions are right, they begin to grow.
-
Mold spores are naturally dispersed through air movement, meaning they’re almost impossible to avoid. However, without moisture, they won’t grow into visible mold.
5. Temperature Conditions
Mold generally thrives in warm environments, though it can also grow in cooler settings. The ideal temperature range for mold growth is between 60°F to 80°F (15°C to 27°C).
-
Mold grows more rapidly in warmer, humid conditions, such as bathrooms and basements where both heat and moisture are common.
6. The Mold Growth Process
Once mold spores land on a damp surface with a food source, they begin to grow and form colonies. The process includes:
-
Spore germination: Mold spores settle on wet surfaces and start to grow when moisture is present.
-
Mycelial growth: Mold develops root-like structures (hyphae) that penetrate the surface to feed on the material.
-
Spore production: As the mold matures, it produces new spores that spread to form new colonies.
Common Areas Where Mold Forms
-
Bathrooms: High moisture levels from showers, sinks, and bathtubs create an environment for mold growth, especially in grout lines, around faucets, and on shower curtains.
-
Kitchens: Leaks from pipes under sinks or dishwashers can cause moisture buildup, leading to mold formation.
-
Basements: Poor ventilation and ground moisture make basements a prime location for mold growth.
-
Attics: Roof leaks and poor airflow can lead to mold growth on insulation and wood surfaces.
-
Behind walls: Mold can form behind drywall or wallpaper when water has seeped in from leaks.
How to Prevent Mold Growth
To prevent mold, here are some key strategies:
-
Control moisture by repairing leaks quickly and using dehumidifiers in damp areas.
-
Improve ventilation by installing exhaust fans in bathrooms, kitchens, and laundry rooms.
-
Choose mold-resistant materials such as mold-resistant paint, caulk, and drywall.
-
Clean up spills promptly and keep areas dry, especially in high-humidity locations.
-
Inspect vulnerable areas like bathrooms and basements for early signs of mold.
Mold forms when moisture, organic materials, and spores combine in areas with poor ventilation. By understanding the conditions that promote mold growth and taking preventative measures such as controlling moisture, improving airflow, and maintaining your home, you can reduce the risk of mold infestations and ensure a clean, healthy living environment.
The Dangers of Mold: How It Affects Your Home and Health
Mold may seem like a minor issue, but its impact on both your home and health can be significant. Understanding the harmful effects of mold is crucial to taking proactive measures to prevent its growth. Here's a breakdown of how mold can negatively affect your home and living environment:
1. Damage to Property and Structures
Mold doesn’t just affect the aesthetics of your home; it can cause serious structural damage if left untreated. Mold feeds on organic materials such as wood, drywall, and fabrics, causing them to deteriorate over time.
-
Wood: Mold can weaken wooden beams, flooring, and furniture, causing them to rot and lose structural integrity.
-
Drywall: Mold can eat away at drywall, causing it to crumble, weaken, and require costly replacement.
-
Paint: Mold growth can cause paint and wallpaper to peel or stain, leading to unsightly walls and ceilings.
Over time, the damage can become extensive, resulting in expensive repairs and renovations.
2. Health Hazards
Mold can be detrimental to your health, particularly for individuals with respiratory conditions, allergies, or compromised immune systems. When mold spores are inhaled, they can cause a range of health issues, including:
-
Respiratory Problems: Mold exposure can lead to coughing, sneezing, wheezing, and shortness of breath. It can exacerbate conditions like asthma or bronchitis.
-
Allergic Reactions: Mold is a common allergen, causing symptoms such as a runny nose, itchy eyes, skin rashes, and sinus congestion.
-
Infections: For individuals with weakened immune systems, mold exposure can lead to more severe infections or fungal diseases.
-
Toxic Mold: Some types of mold, like black mold (Stachybotrys chartarum), produce mycotoxins that can cause serious health issues, including neurological problems, dizziness, and memory issues.
Long-term exposure to mold can significantly affect overall health, leading to chronic conditions and complications.
3. Musty Odors and Air Quality
Mold growth is often accompanied by a strong, musty smell, which can permeate throughout your home. This unpleasant odor is not only an indicator of mold presence but also a sign of poor indoor air quality. The spores and other byproducts released by mold can make the air feel heavy, musty, and unclean.
-
Air Quality: Mold spores can spread through the air, affecting the air quality in your home. This can lead to discomfort, especially for those with allergies or respiratory issues.
-
Persistent Odors: The musty smell can linger even after mold is removed, as the odor may have penetrated into fabrics, carpets, and furniture.
4. Decreased Property Value
Mold can significantly reduce the value of your home, especially if it's widespread or difficult to remove. Potential buyers may be deterred by the presence of mold, fearing potential health risks and costly repairs. Even if the mold is removed, its previous existence can affect the home’s resale value due to lingering odors or concerns about hidden damage.
5. Financial Costs
The cost of addressing mold growth can escalate quickly. Removing mold from your home often involves more than just cleaning visible areas—it requires a thorough inspection, professional remediation, and potential repairs to damaged structures.
-
Mold Remediation: If the mold problem is extensive, you may need professional help, which can be costly. Remediation may involve the use of specialized equipment, cleaning solutions, and removal of affected materials.
-
Structural Repairs: As mold damages wood, drywall, and other materials, repairs may be necessary to restore the structural integrity of your home, adding to the overall cost.
6. Impact on Insulation and HVAC Systems
Mold can grow in hidden spaces, including behind walls, in insulation, or within your HVAC system. If mold spreads through the ductwork, it can contaminate the air and circulate spores throughout the home. This can further exacerbate air quality issues and increase the spread of mold.
-
Insulation: Mold can destroy insulation, reducing its efficiency and requiring costly replacement.
-
HVAC Systems: If mold grows within HVAC ducts, it can spread spores throughout the home each time the system runs, contaminating the indoor air.
Mold can be a serious issue for both your home and your health. The structural damage it causes, the health risks it poses, and the musty odors it creates make it important to address mold problems promptly. Regular maintenance, moisture control, and quick action when mold is spotted can help prevent extensive damage and safeguard both the value of your home and the health of your household.
How to Prevent Mold in Your Home?
Mold thrives in damp, warm, and poorly ventilated areas, and preventing it from growing in your home requires proactive measures. By managing moisture levels, improving ventilation, and maintaining your property, you can reduce the risk of mold growth. Here are some key strategies to prevent mold in your home:
1. Control Moisture Levels
Since mold needs moisture to grow, managing water levels in your home is crucial.
-
Fix Leaks Promptly: Repair any leaks in plumbing, roofs, or walls as soon as they are detected. Even small leaks can provide the moisture mold needs to grow.
-
Dry Wet Areas Quickly: After spills or floods, dry the affected areas within 24 to 48 hours to prevent mold formation.
-
Use a Dehumidifier: In high-humidity areas like basements or bathrooms, a dehumidifier can help reduce moisture in the air and prevent mold growth.
-
Monitor Indoor Humidity: Keep indoor humidity levels between 30% and 50%. Use a hygrometer to monitor the humidity in your home.

2. Improve Ventilation
Proper airflow reduces the moisture that mold thrives on.
-
Install Exhaust Fans: In moisture-prone areas such as bathrooms, kitchens, and laundry rooms, install exhaust fans to improve ventilation and prevent humidity buildup.
-
Open Windows: When possible, open windows to allow fresh air to circulate and reduce moisture in your home, especially during cooking, showering, or after cleaning.
-
Use Air Vents: Make sure air vents are unobstructed and allow for adequate airflow throughout the home.
3. Use Mold-Resistant Materials
In areas susceptible to moisture, consider using materials that are resistant to mold.
-
Mold-Resistant Paint: Apply mold-resistant paint or primer in areas like bathrooms, kitchens, and basements to prevent mold from forming on walls and ceilings.
-
Mold-Resistant Drywall: In areas prone to high humidity, opt for mold-resistant drywall that helps prevent mold from growing behind the walls.
-
Waterproof Flooring: Consider using water-resistant flooring materials like tile, vinyl, or waterproof laminate, which are less likely to absorb moisture compared to carpets or wood.
4. Regular Cleaning and Maintenance
Keeping your home clean and well-maintained can prevent mold buildup over time.
-
Clean Bathrooms and Kitchens Regularly: Wipe down surfaces in high-moisture areas, such as sinks, countertops, and shower tiles, to remove any mold spores before they have a chance to grow.
-
Inspect Hidden Areas: Regularly inspect areas that may not be as visible, like behind appliances, under sinks, and in attics or basements for signs of moisture or mold growth.
-
Wash Fabrics: Wash shower curtains, bath mats, and towels regularly, and ensure they are thoroughly dried before being put back.
5. Seal Gaps and Cracks
Small gaps and cracks can allow water to seep into your home, creating opportunities for mold to form.
-
Seal Windows and Doors: Ensure that windows and doors are properly sealed to prevent water from entering during storms or from condensation.
-
Check Caulking and Grout: Inspect and replace any worn-out caulking around tubs, sinks, and windows to prevent water from seeping into walls and creating mold-friendly environments.
6. Maintain Your HVAC System
Your heating, ventilation, and air conditioning (HVAC) system can spread mold spores if not properly maintained.
-
Clean Air Ducts: Regularly clean and inspect the air ducts in your HVAC system to prevent mold growth and the circulation of spores throughout your home.
-
Change Filters: Replace air filters regularly to improve airflow and reduce the accumulation of moisture that mold thrives on.
7. Control Water Flow Around Your Home
Ensure that water flows away from your home’s foundation to prevent moisture from seeping in.
-
Clear Gutters and Downspouts: Clean gutters regularly to prevent water from overflowing and seeping into the foundation of your home.
-
Grade Your Yard: Make sure the ground around your home slopes away from the foundation to direct water away from the house.
-
Repair Roof Damage: Inspect your roof for damage and repair any leaks to avoid water entering your home.
8. Use Mold-Resistant Products in Damp Areas
In areas that are consistently damp, like basements or crawl spaces, use mold-resistant materials and products to minimize growth.
-
Mold-Resistant Insulation: Consider using mold-resistant insulation materials to prevent mold from growing in hidden spaces.
-
Crawl Space Vapor Barriers: Install vapor barriers in crawl spaces to prevent moisture from rising into the home, where mold can develop.
Preventing mold in your home is about controlling moisture, improving ventilation, and maintaining your living space. By taking these steps, you can reduce the likelihood of mold growth, keeping your home healthy and comfortable. Regular maintenance and prompt action when moisture issues arise are essential to ensuring that mold doesn't become a problem in the first place.
Most Common Types of Mold Found in Homes
Mold is a common issue in many households, especially in areas with high humidity and moisture. Different types of mold can thrive in various indoor environments, and some are more frequently found in homes than others. Here are the most common types of mold that you may encounter in your home:
1. Aspergillus
Aspergillus is one of the most common types of indoor mold. It can grow on a variety of surfaces, including fabrics, walls, and wood. It thrives in areas with high humidity or moisture, making bathrooms, kitchens, and basements prime areas for its growth.
-
Health Risks: Aspergillus can cause respiratory issues, particularly in people with asthma or weakened immune systems. Certain strains can also produce mycotoxins, which can be harmful to health.
2. Cladosporium
Cladosporium is another common mold that grows both indoors and outdoors. It tends to grow on organic materials such as wood, textiles, and carpet, especially in areas with moderate humidity levels. This mold is often found in attics, basements, and on window sills.
-
Health Risks: Cladosporium can trigger allergic reactions like sneezing, coughing, and skin irritation. It can also worsen asthma and other respiratory conditions.
3. Penicillium
Penicillium is a mold that commonly appears in homes with water damage, particularly in areas such as kitchens, bathrooms, and basements. It often grows on materials like carpets, wood, and insulation.
-
Health Risks: This mold can cause allergic reactions, respiratory issues, and other health problems, especially in people who are sensitive to mold.
4. Stachybotrys Chartarum (Black Mold)
Stachybotrys chartarum, often referred to as black mold, is one of the most notorious types of mold. It grows on materials that have been exposed to prolonged moisture, such as drywall, wood, and carpet. Black mold is commonly found in areas with chronic water damage.
-
Health Risks: Black mold is highly toxic and can cause severe health problems, including respiratory issues, headaches, fatigue, memory loss, and neurological symptoms. It is particularly dangerous for children, the elderly, and those with weakened immune systems.
5. Alternaria
Alternaria is another common mold species found in homes. It typically grows on fabrics, carpets, and other materials exposed to moisture. It is commonly found in bathrooms, kitchens, and basements.
-
Health Risks: Alternaria is a known allergen and can cause symptoms like sneezing, runny nose, and coughing. It can also trigger asthma attacks in susceptible individuals.
6. Aureobasidium
Aureobasidium is a mold that often appears on wood, wallpaper, and painted surfaces. It is typically found in damp areas like bathrooms, kitchens, and basements. The mold often appears as a pink, brown, or black patch.
-
Health Risks: While generally less harmful, Aureobasidium can cause allergic reactions such as skin rashes or respiratory problems in sensitive individuals.
7. Fusarium
Fusarium mold thrives in areas with high humidity and moisture. It commonly grows on fabrics, carpets, and wet surfaces in homes.
-
Health Risks: Fusarium can cause respiratory issues, skin infections, and eye infections, especially for individuals with weakened immune systems.
8. Chaetomium
Chaetomium is a mold typically found in areas with severe water damage, such as homes affected by flooding or leaks. It grows on materials like wood, paper, and fabric and often appears as a cotton-like substance that can be white, green, or brown.
-
Health Risks: Exposure to Chaetomium can lead to respiratory issues, allergic reactions, and skin irritation. The mold produces mycotoxins, which can be harmful, particularly to individuals with respiratory conditions or compromised immune systems.
Mold can develop in any home with excessive moisture or poor ventilation, and many common types of mold can negatively affect both the structure of your home and the health of its inhabitants. Identifying mold early and taking steps to control moisture and remove it can help prevent potential health risks and damage. If you discover mold growth in your home, it is important to address the issue as soon as possible, especially if the mold is widespread or if you or your family members have respiratory issues or allergies.
What Does Mold Affect in Homes?
Mold can have a significant impact on various aspects of your home, from the structural integrity to the health of the inhabitants. Recognizing what mold can damage will help you take the right steps to prevent it and deal with it effectively. Here’s how mold affects different areas of your home:
1. Structural Damage
Mold can cause considerable damage to your home’s structure, particularly when it grows on materials like wood, drywall, and insulation.
-
Wood: Mold weakens wooden structures, such as beams, floors, and furniture, causing them to rot and lose stability.
-
Drywall: Mold grows quickly on drywall, leading to crumbling, warping, and eventual replacement needs.
-
Insulation: Mold can ruin insulation by reducing its effectiveness and encouraging further mold growth in hidden areas, leading to long-term issues.
2. Building Materials and Surfaces
Mold can deteriorate various building materials and surfaces, causing unsightly damage, stains, and the need for costly repairs.
-
Paint and Wallpaper: Mold can cause peeling, discoloration, or blistering of paint, and it can damage wallpaper as well.
-
Flooring: Mold can thrive on carpets, wood floors, tiles, and vinyl, leading to discoloration, a musty odor, or even deterioration of the materials.
-
Walls and Ceilings: Mold can damage both walls and ceilings, especially in moisture-prone areas like bathrooms and basements, leading to visible stains and potential structural problems.
3. Health Impact
Mold exposure can negatively affect your health, triggering a range of allergic reactions and respiratory issues, particularly for sensitive individuals.
-
Respiratory Problems: Mold spores can lead to coughing, sneezing, wheezing, and difficulty breathing, particularly for people with asthma, allergies, or other respiratory conditions.
-
Allergic Reactions: Mold can cause symptoms like itchy eyes, skin rashes, a runny nose, and sinus congestion, especially for those already prone to allergies.
-
Toxicity: Certain types of mold, like black mold (Stachybotrys chartarum), release mycotoxins that can cause more severe health effects, including headaches, dizziness, and memory problems.
4. Personal Belongings and Furniture
Mold can damage personal items and furniture, leading to costly repairs or replacements.
-
Clothing: Mold can discolor or ruin fabrics, leading to musty smells and stains that may be difficult to remove.
-
Furniture: Wooden and upholstered furniture can suffer from mold growth, causing weakening or visible damage.
-
Books and Paper: Mold growth can damage books, documents, and paper items, making them difficult or impossible to salvage.
5. Indoor Air Quality
Mold significantly impacts indoor air quality, contributing to an unhealthy living environment.
-
Mold Spores: Mold releases microscopic spores into the air, which can spread throughout your home and lower air quality.
-
Musty Odors: Mold produces a strong, unpleasant smell that can linger even after the mold has been removed, affecting the atmosphere in your home.
6. HVAC Systems
Mold can grow in your heating, ventilation, and air conditioning (HVAC) system, which can spread spores throughout your home.
-
Air Ducts: Mold growth in air ducts can distribute mold spores whenever the HVAC system runs, worsening air quality and triggering health problems.
-
Filters and Coils: Mold can develop on filters and coils, affecting the HVAC system’s efficiency and spreading spores to other parts of the house.
7. Kitchen and Bathroom Fixtures
High-moisture areas like kitchens and bathrooms are prime spots for mold growth, especially around fixtures.
-
Sinks and Faucets: Mold can form around faucets and sinks where water often splashes or collects.
-
Shower Areas and Tiles: Showers, bathtubs, and tiles are particularly vulnerable, with mold thriving in grout lines and on shower curtains.
-
Countertops and Cabinets: Mold can develop around sinks or in areas with water damage, discoloring surfaces and weakening materials.
8. Windows and Doors
Mold can also form around windows and doors, especially where condensation or leaks occur.
-
Window Frames: Wooden window frames, sills, and surrounding walls are common areas for mold growth, particularly due to condensation.
-
Doors: Mold can appear around doors, especially in high-humidity areas or places prone to water leaks.
Mold can affect a wide range of materials and spaces in your home, including structural elements, personal belongings, air quality, and even your health. Identifying and addressing mold growth early is key to preventing long-term damage. If you notice mold, it’s important to take action quickly—whether it’s by fixing water leaks, improving ventilation, or calling in professionals to safely remove the mold.
Conclusion: Stay Proactive and Keep Mould at Bay
Mould removal is an essential part of home maintenance. Regular cleaning, proper ventilation, and addressing moisture problems quickly are key to preventing mould growth. By taking proactive measures, such as using mould-resistant paints and regularly inspecting vulnerable areas, you can ensure your home stays safe and free from harmful mould.
Frequently Asked Questions
You may notice visible signs of mold, such as black, green, or white patches on walls, ceilings, or other surfaces. A musty or earthy odor in your home is also a strong indicator. Additionally, if anyone in your household starts experiencing allergic reactions or respiratory issues, mold might be the cause.
Mold grows in areas with excessive moisture. Common causes include leaks in pipes, roofs, or windows, poor ventilation, high humidity, water damage from flooding, or condensation in damp spaces like bathrooms, kitchens, and basements.
For small mold problems (less than 10 square feet), you may be able to handle removal yourself using store-bought cleaning solutions, vinegar, or a bleach solution. However, for larger infestations or mold in hard-to-reach areas, it is best to hire a professional mold remediation service to ensure safe and effective removal.
Mold can grow on any organic material that retains moisture. Common surfaces affected by mold include wood, drywall, carpet, insulation, fabric, and ceiling tiles. Mold can also grow on painted surfaces and other porous materials.
The safest way to remove mold is by wearing protective gear such as gloves, a mask (N95 respirator), and goggles. Use a mold-specific cleaner or a solution of diluted bleach or vinegar, scrubbing affected areas thoroughly. Be sure to ventilate the area properly, and if mold growth is widespread, consult a professional mold remediation company.
To prevent mold growth, reduce moisture levels in your home. This can be done by fixing leaks, improving ventilation (especially in high-humidity areas like bathrooms), using dehumidifiers, and keeping indoor humidity levels below 60%. Ensure your home is well-ventilated and areas prone to moisture (like showers and basements) are adequately dried.
The time it takes to remove mold depends on the size of the affected area. Small areas can be cleaned in a few hours, while larger infestations may require several days, especially if professional remediation is needed to address structural damage or extensive contamination.
Mold removal is effective as long as the underlying moisture issue is addressed. If the source of water or humidity is not fixed, mold can return. Therefore, it’s essential to identify and resolve the root cause of moisture before conducting mold removal.
The cost of mold removal can vary depending on the extent of the infestation, the location, and whether you hire professionals. Small, isolated areas can be relatively inexpensive to clean, while large infestations may cost hundreds to thousands of pounds for remediation. The cost also increases if structural repairs are required.
Mold removal may be covered by homeowners’ insurance, but this depends on the cause of the mold. If the mold resulted from a covered event, such as a sudden pipe leak, the cleanup may be covered. However, mold resulting from long-term neglect or moisture issues may not be covered. It’s best to check your policy for specific details.
Professional mold remediation specialists use specialized equipment to identify and safely remove mold. They may use advanced tools like HEPA vacuums, air scrubbers, and chemical treatments to eliminate mold growth and prevent it from spreading. In severe cases, they may remove and replace affected materials, such as drywall or insulation.
Yes, mold can cause a range of health issues, especially for individuals with allergies, asthma, or weakened immune systems. Symptoms include coughing, sneezing, itchy eyes, skin rashes, headaches, and respiratory problems. Prolonged exposure to mold, especially toxic mold like black mold, can cause more severe health effects.
Not necessarily. Many items, including furniture and personal belongings, can be cleaned and disinfected if mold is caught early. For fabrics, washing or professional cleaning may be effective. However, porous items such as mattresses or upholstered furniture that have been severely affected may need to be discarded.
Yes, if the moisture issue is not properly resolved, mold can return. Ensuring your home is properly ventilated, keeping humidity levels under control, and fixing any leaks are key factors in preventing mold from reappearing.
If you find mold, address the moisture source immediately (e.g., fix leaks or improve ventilation). Clean small mold spots using appropriate cleaning methods. If the mold is widespread or you're unsure how to handle it, contact a professional mold remediation service to ensure safe and thorough removal.


